Well, last weekend I decided to make the ride on the GS that much better by replacing the stock springs in the front suspension with some stiffer, aftermarket ones. It seems that the soft springs issue is common with the GS and many riders suggest one of the first upgrades an owner should undertake is the front springs. Ok, so I'm a tad late, but I must admit I am so glad I did it. I found that the front suspension regularly bottomed out with the stock springs installed. When going over speedhumps, potholes and even riding into driveways, the suspension would reach its limits with a shuddering, jarring thump. Not with the replacement springs :) The ride is stiffer, the suspension not as soft and since changing over to the new springs, i haven't bottomed out the front suspension.
I ordered the springs from the USA (Sonic Springs), and paid for them online and they were shipped and arrived about 10 days after ordering. That's brillian seeing as it takes up to two weeks to get things from Sydney which is only 175Kms away compared to 15,000Kms to the USA. I paid US$80 for the springs and US$30 for the postage, and they arrived nicely packaged complete with a plastic tube for cutting the new spacers and instructions for fitting. I chose to replace my springs without changing the spring oil. There is an additional upgrade suggested in replacing the standard 10W spring/fork oil with 15W spring/fork oil. The heavier oil enhances the effect of the heavier springs. Changing the fork oil can be done either by completely removing the front forks (requiring wheel and front fairing removal) and draining the oil or by leaving the forks in situ and syphoning the oil out of the forks using a large syringe and rubber tube. This method is not as effective and leaves residual older oil in the forks as well as possibly some debris etc.
Anyway on to the replacement of the springs without removing the forks.
Step 1.Preparing the motorcyclePlace the motorcycle on the centre stand and centralise the handlebars so the front wheel is not turned. Put some cardboard sheeting or old cloth under the front of the bike to soak up any oil drips that may occur.
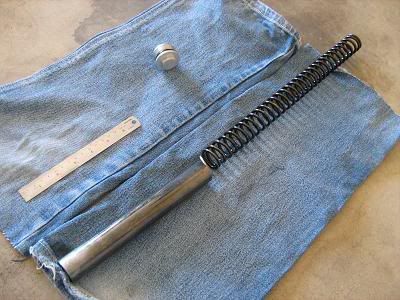
Remember: we will only replace one spring at a time so that the front won't collapse if we removed both springs at the same time.Step 2.Tools requiredThe photo below shows the tools required to complete the replacement.
a) hexagonal Allen key of correct size for removing the handlebars (no need to remove any switch gear, just the bars from the steering yolk)
b) socket set for removing the fork end caps
c) long piece of coathanger wire, bent at the end (for retrieval of spring seat and spring from fork)
d) pencil and rule for measuring the new spacer length
e) hacksaw for cutting the spacer tube
f) vice for holding the spacer tube when you cut it, and
g) clean rags for preventing oil dripping when removing original springs from forks.
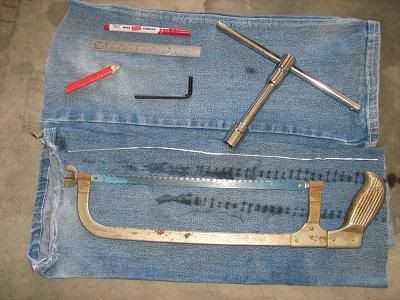 Tools required for the jobStep 3.Removing Handlebars
Using the hexagonal Allen key, remove the four (4) small hexagonal bolts holding the handlebars to the steering yolk. Put the handlebar clamps and bolts to one side and gently lift the handlebars forward so that the fork end caps are exposed completely.
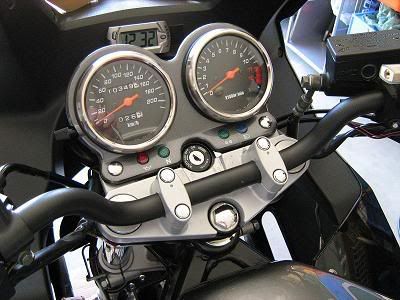 Handlebars in normal position
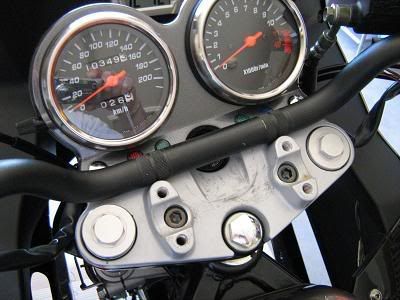 Handlebars removed in showing fork end caps exposedStep 4.Removing the Fork End Caps and Spacer.
Using the socket of the correct size gently remove the fork end cap of the side you will be replacing first. Make a mental note of the tension on the cap to initially undo it so you can replace it using the same tension. Be very careful when removing the end cap as the fork is under spring load and the end cap has some spring tension under it. Keep downward pressure on the endcap as you unscrew it and be ready for the release of spring loading when the cap comes from from the fork threads. Be careful with the threads on the end cap and inside the fork tube as the threads are quite fine. Also be careful of the endcap rubber "O" ring that seals the top of the fork and prevents oil leakage. Once the end cap has been removed, place it somewhere clean and safe. At this stage the spacer will be poking out of the top of the fork tube by about 3 cms (about 1.5 inches). Measure how much of the spacer is poking out from the tube and make a note of this for later use when determining the correct replacement spacer length. Gently remove the spacer from the tube and catch any oil drips on a rag. Put space on a rag somewhere out of the way.
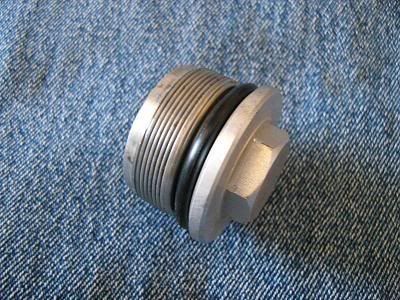 Fork end cap showing fine thread and rubber "O" ring
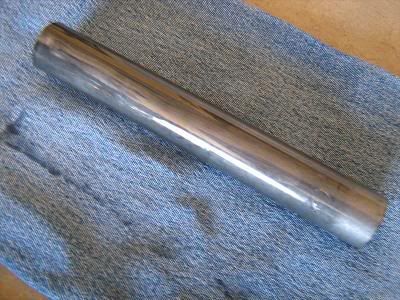 Original metal spacer removed from fork tube
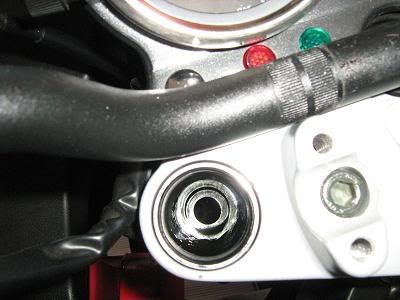 View of the inside of the fork tube showing the "washer" spring seat on top of the spring inside the fork.Step 5.Removing the Spring Seat and Spring
Using the coathanger wire, very gently (making sure not to scrape the inside of the fork tube as you do so) lift out the spring seat washer and place on a clean cloth/rag with the old spacer.
Then, using the wire lift out the original spring. When the spring gets to the top of the fork tube, use your fingers to hold it and allow residual oil on the spring to drain back into the fork tube. Wait a minute or so for this to occur then remove the spring gently (don't scrape the end cap thread) using a rag to catch any residual oil and place the spring with the old spacer and spring seat.
 This photo shows the old spacer, the spring seat and the spring with the end cap in the background.Step 6.Installing the new Spring, Spring Seat and Spacer
Firstly take the new spring, ensure it is clean of any metal residue, filings or debris and gently insert it into the fork tube, gently lowering it to the bottom of the fork with the wire hook.
Once this is done, clean the old spring seat washer and lower that onto the top of the spring.
Take the replacement spacer tubing and insert into the fork tube so it is seated on the spring seat. Using a rule measure the distance above the fork end required for the spacer. Generally, it is suggested that road bikes have between 2 - 2.5 cm (3/4" to 1") preload on the spring. This means that when the fork end cap is screwed into place, the spring is compressed by that amount. I measured 2 cm above the top of the fork tube on the spacer material. I actually initially made it 2.5cm but I found I couldn't compress the spring sufficiently to screw the end cap in, so had to reduce the spacer length by .5 cm.
Place the spacer material in a vice and carefully saw the spacer to the correct length. Hopefully the second spacer will be of similar length, however don't cut that spacer yet. Wait till you do the next spring. Clean off the residue from the cut section of pipe and ensure all debris is removed.
Carefully place new spacer in the fork tube.
Step 7.Replace the Fork End CapTake the fork end cap and using the socket wrench push the spacer down into the tube using the endcap for purchase and gently commence to screw the end cap into place. Be very careful not to strip the thread of the end cap here. Once the end cap is in place tighten it to the same tension as you had when you undid the cap.
Step 8.Replace the other SpringFollow Steps 4 to 8 above for the other side fork spring replacement.
Step 9.Replace HandlebarsReplace handlebars in the smae position as they were when you removed them and tighten the handlebar clams via the four (4) hexagonal bolts.
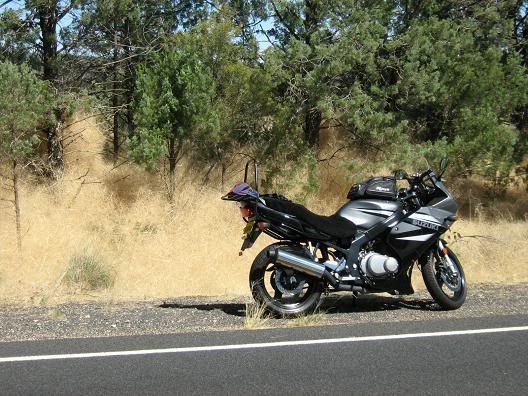
Job completed. Tidy up and take the bike for a test ride, noting change of feel in front suspension.


